When you're ready to personalise a form, open the form you want to work with.
Go to the Setup menu and choose Customise Forms. The Customise Forms window appears.
Can't see the Customise Forms option? By default, you need to have been assigned the Administrator or Accountant/Bookkeeper role in order to be able to access this feature. See Default user roles.
Click the tab for the type of form you want to customise.
Click a form group to display the forms for that group. For example, click the Item group in the Invoices tab to see all item invoice forms.
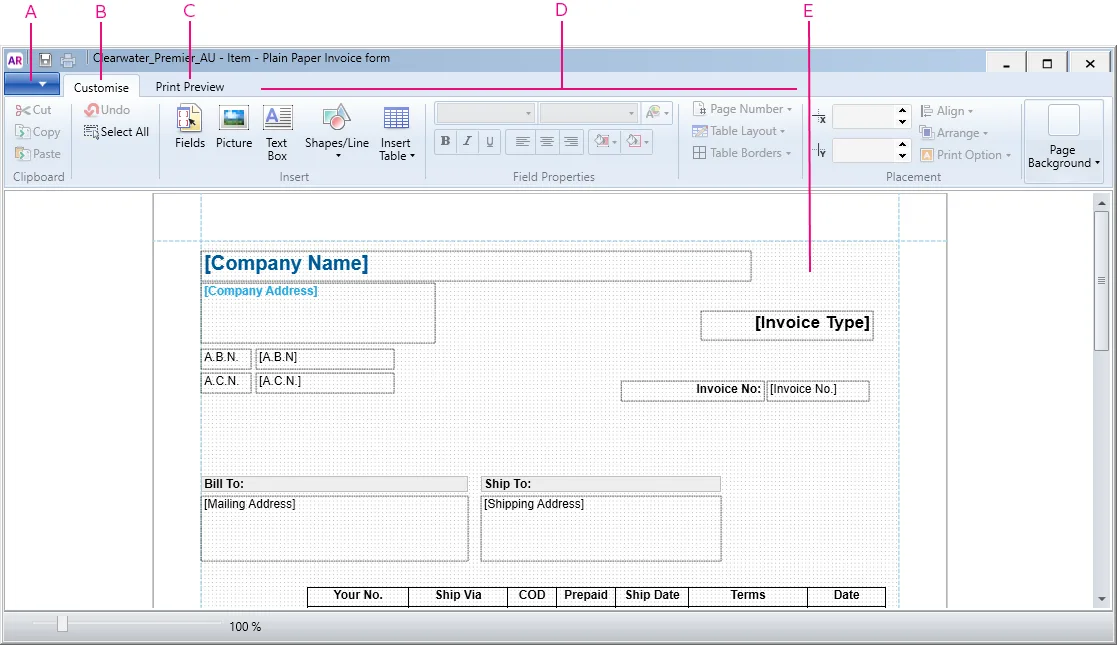
Click the form, then click Customise. The form opens in the form design window, like this:

The form designer window

A | File menu | View printing and saving options. |
B | Customise tab | This is the main tab for customising your form. You can add fields, format text and select table layouts. |
C | Print Preview | See what your form will look like when printed, and where you can change the margins, orientation and page size. |
D | Customise options | This area of the window is where you make selections for customising your form. |
E | Form body | This is the body of the form showing its contents. Click an element (text box, table, etc.) to view its properties in the Customise tab. |
Cheques have two parts A cheque form has two parts: the cheque itself and the stub. So you'll need to customise the cheque and the stub separately. See Personalising cheques.
What next?
After displaying the form, you can:
Set properties that apply to the whole form, such as background colour and page size
Add and edit pictures and shapes, tables, text and data fields.
FAQs
Can I create a new form from scratch?
No, you'll need to personalise an existing form - which means a lot of the work has already been done for you.