When working on a client’s file, you may come across some transactions that you can’t allocate until you get more information about them. You may have also been selected to receive an email requesting you to generate coding reports.
To help with this, you can generate a report straight from MYOB Practice that lists all unallocated transactions for a date range, so you can get your client to fill in the gaps.

And to save more time, you can create coding reports for several clients in one go, without needing to open each MYOB Essentials, MYOB AccountRight or MYOB Business file.
You can also schedule coding report reminder emails for your staff, and use templates for the coding report messages sent to your clients. See Report frequency.
Generate coding reports
Log in to MYOB Practice and go to Client files > Online files.
Select the files you want to create coding reports for, by clicking the checkboxes next to the file and client names.
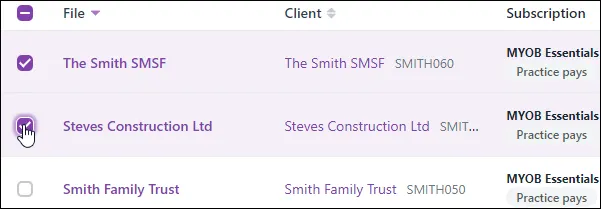
If you've received an email request to generate coding reports, you should already have clients selected. Review whether all the clients who need a coding report are selected, and select/deselect as necessary.
If you've set up coding report frequencies for the clients, you can filter the Client files page to show just those who have a report due.
Click Generate coding report.

In the Generate coding report window, select the transaction date range you want to include in the report.
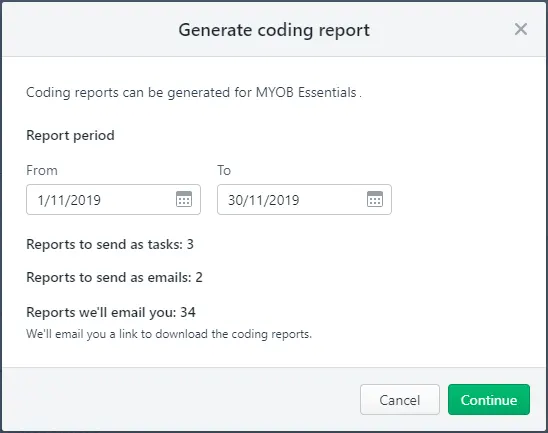
This summary window tells you how many of the files you selected will be sent to clients with access to a portal, and how many will be emailed to your clients or to you.
If you haven’t specified delivery preferences for a client, we’ll email you a link to download their reports.Click Continue. There are a couple of different windows and options you may see depending on your setup and the client you selected.
Complete the options in the window you see:
If you haven't set up report format preferences for one or more of the selected clients, you'll need to select the report format to use for them (for the others the formats you've already defined for each client will be applied automatically).
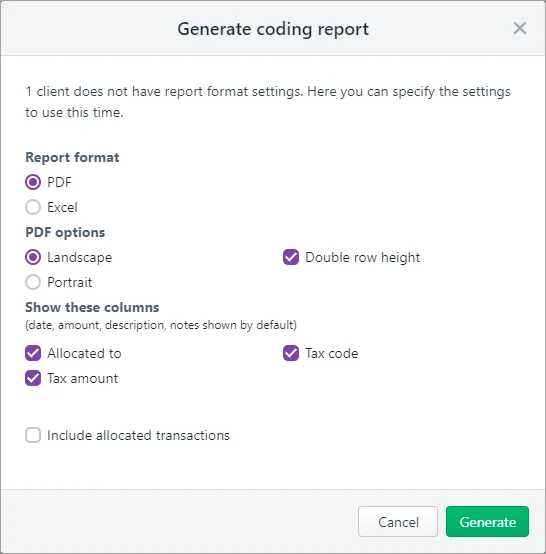
If the report will be printed, we suggest using the PDF format. If you select PDF, you can:
select the page orientation, either Landscape or Portrait.
give your clients more room to write their notes in, by selecting the Double row height option.
Select which optional columns you want to add.
If you're generating a PDF with the portrait orientation, you can only show/hide the Allocated to column.
Select if you want to Include allocated transactions in the report. This might be useful if you’ve entered notes against allocated transactions that you need further information or source documents for.
Click Generate.
If you’re sending reports to client portals or emailing reports directly to clients, the Coding report notification window appears.
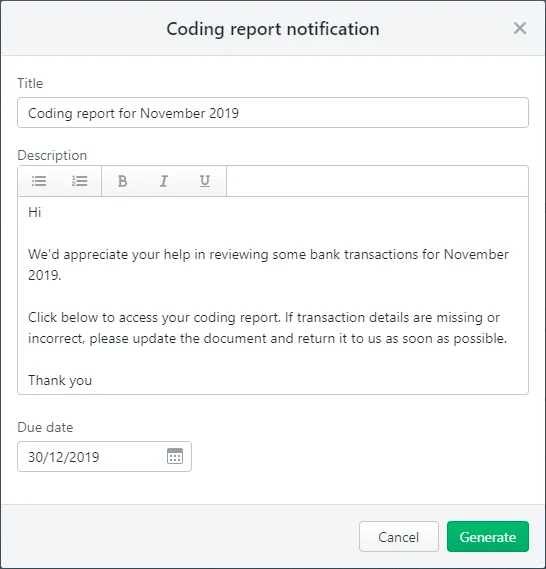
Enter a Title. This will be the subject line of the email notification all clients will receive, and for tasks, the title of the task in the portal.
Enter a Description. This will appear in the email notification for all clients, and for tasks, will be part of the task details.
(Optional, tasks only) Enter a Due date if you want your clients to review the coding report by a certain date.
Click Generate. We’ll start sending the emails and if applicable, coding report tasks for your clients to review in their portals. This can take a few minutes to complete, and you’ll receive an email to confirm what we’ll be sending.
For clients with portals, you can choose to send a coding report task to the bulk task assignees specified in each portal. If bulk task assignees are not specified, the task will be assigned to all full access users.
You set up the delivery preference in each client’s settings.
You can only create a task for a client if:
-
you’ve created a client record for them in MYOB Practice
-
have linked the client to their MYOB Essentials or AccountRight file
-
the client has access to a portal.
For clients without portal access, we can email your client a link to download their reports, or we can email them to you, and you can then email them manually, or print and mail them out.
The selected clients are notified by email or as a task.
-
If you’ve selected to receive client reports by email, you’ll receive an email when their reports are ready to download.
When you receive the email, click Download your coding reports in the email, and a zip file containing the reports will start downloading.
If you’re not logged in to MYOB Practice, you’ll need to log in before you can download the zip file. If you have access to multiple practices, make sure you log in to the relevant practice.After the zip file has finished downloading, open or unzip/extract it to view the coding reports it contains.
In the example below, the zip file was downloaded using the Chrome browser on a PC. Choose Open to access the reports that are in the zip file. To find the zip file on your computer, choose Show in folder.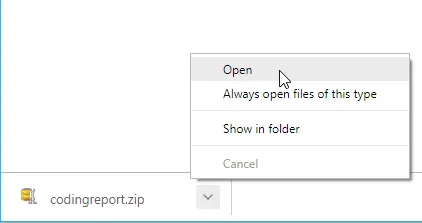
You can see the status of all the coding reports you've generated on the Online files page's Last report column.
Failed coding reports
You may see an error about coding reports failing, at the top of the Online files page.

You can see all the reports that failed in the Last reports column on the page. By default, the column is sorted to show failed reports to help you quickly identify reports that may need your attention. But if you see reports with other statuses, you can click the Last reports column header to sort the list by failed reports.
Click the Online files entry for this file to see more details.
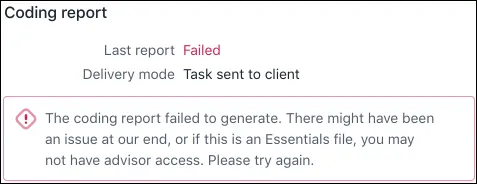
The report generation may have failed because of an issue on our end or because of an MYOB Advisor access issue. You can try to generate the report again and, if it still fails, contact support.