This information only applies if you have MYOB Practice without MYOB AE/AO.
Save time when creating clients and contacts by importing in bulk.
Download a CSV template, enter the client or contact details into the CSV, and import the details into MYOB Practice.
Complete the four tasks below to import the contacts and clients in bulk.
-
Only Practice administrators can import contacts and clients.
-
You can import only one file at a time and cannot have more than 4,500 contacts.
1. Download the sample template
Log in to MYOB Practice as a Practice administrator and go to Clients > Client list.
Click Import on the top-right of the page.
If you're not an administrator, the Import button will not be active
In the Import Contacts window, select Download template. The template is downloaded to your browser's download location.
2. Enter details in the template
-
The template includes columns that represent field names in MYOB Practice. Some of the columns have restrictions, like a character limit or maximum length. Follow the guidelines included in the template to correctly enter details.
-
Don't delete or change the order of the columns in the template. You can change the width of the columns, but they must be in the same order that they were originally in when you downloaded the template.
-
If you want to create a client, make sure you enter the ClientCode. If you leave it blank, the details will be imported as General contact. If you import without a client code, you can change the contact to a client in MYOB Practice.


Open the downloaded template.
Enter the details of the contacts and clients you want to import.
Save it to your computer and make sure the Save as type is a CSV file.
You can save the file using the same name as the originally downloaded file to overwrite the original file, or save the filing using another name to keep a copy of the original template.
3. Upload the file in MYOB Practice
Log in to MYOB Practice and select Clients > Client list.
Click Import on the right side.
In the Import Contacts window, in the Upload your file section, click Select File.
Select the CSV file you've saved with your contacts details. The CSV will appear in the Upload your file section.


4. Import the file
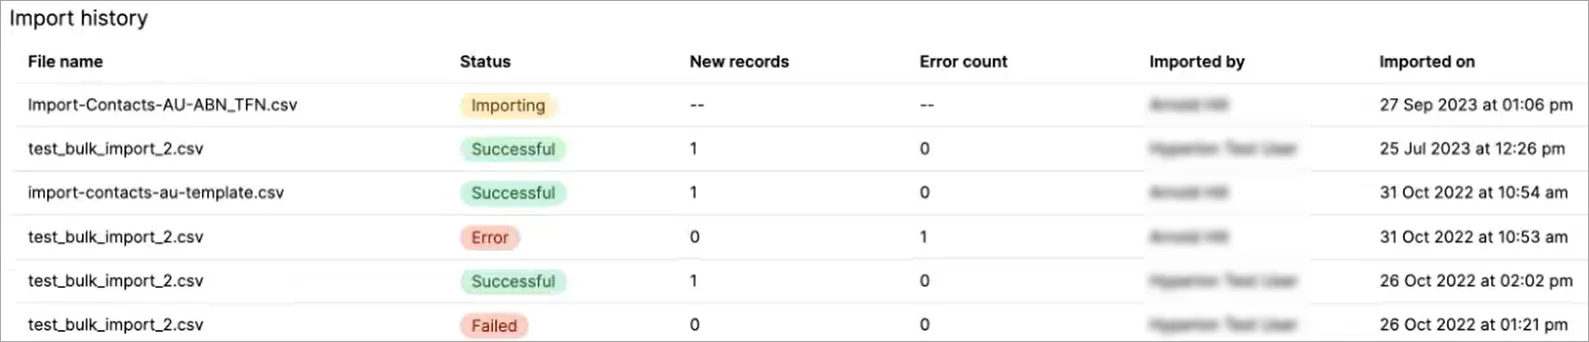
Click Import contacts. The Status column tells you if the import is in progress, successful or has an error. You'll also receive an email to let you know if the import is successful or not.
If the import was successful, you can see the details of the contacts imported.
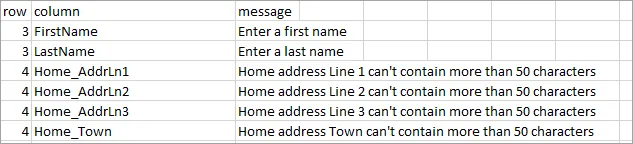
If the import has an error, click the ellipses at the end of the line and select Download error file. The error file is downloaded to the browser's default location and includes information about what you need to do to fix the error.
If you need help fixing the error, in MYOB Practice, click the Help button (?) in the left menu bar, select Log a support call and complete the Support request form. Include a reference to KB0029940 or KB0029943.
To prevent duplicate TFNs, ABNs and WPNs (Australia only) or NZBNs and IRD numbers (New Zealand only) in MYOB Practice, the import will fail if these numbers already exist in MYOB Practice or in the CSV file. Use the error file to identify the numbers and associated clients.

