Bank feeds are an efficient way to manage money coming into and out of your bank accounts, including your payroll payments. But sometimes bank feeds doesn't reflect the particular way you pay your staff.
Most banks send employee payments as bulk transactions in bank feeds, which makes it easy to match them against grouped electronic payments in MYOB Business. But some banks send employee payments individually, which means you aren't able to match them. If this is happening to you, see the options below for matching these payments.
Example
An individual employee payment appears in your bank feed. You're not able to match this individual payment to your grouped electronic payment record:

This help topic assumes you're using electronic payments to pay employees and that you bring bank transactions into MYOB Business using either bank feeds or by importing bank statements. We've focused on employee payments, but the same workarounds can be used if you pay suppliers electronically.
There are a couple of different options you have:
Option 1: delete the grouped electronic payment and create individual electronic payments. Recommended if you have fewer employees to pay or you don't mind creating bank files for each individual employee payment.
Option 2: process the electronic payment to a payroll clearing category, then allocate the bank feed transaction to the same category. Recommended if you have many employees, or you just prefer to batch upload bank files.
Option 1: Delete the grouped electronic payment and create individual electronic payments
1. Delete the electronic payment
What happens when I delete a grouped electronic payment?
-
Only the grouped electronic payment will be deleted.
-
The individual employee payment transactions (contained in the grouped electronic payment) will not be deleted. Instead, they'll be listed again on the Prepare electronic payments page, ready to be processed again.
-
If a bank file was uploaded to a bank, it won't be affected.
Go to the Banking menu and click Find transactions.
On the Debits and credits tab:
Enter a date range that includes the date you processed the electronic payment.
In the Account field, choose your Electronic Clearing Account.
Click the Reference no to open the electronic payment transaction.

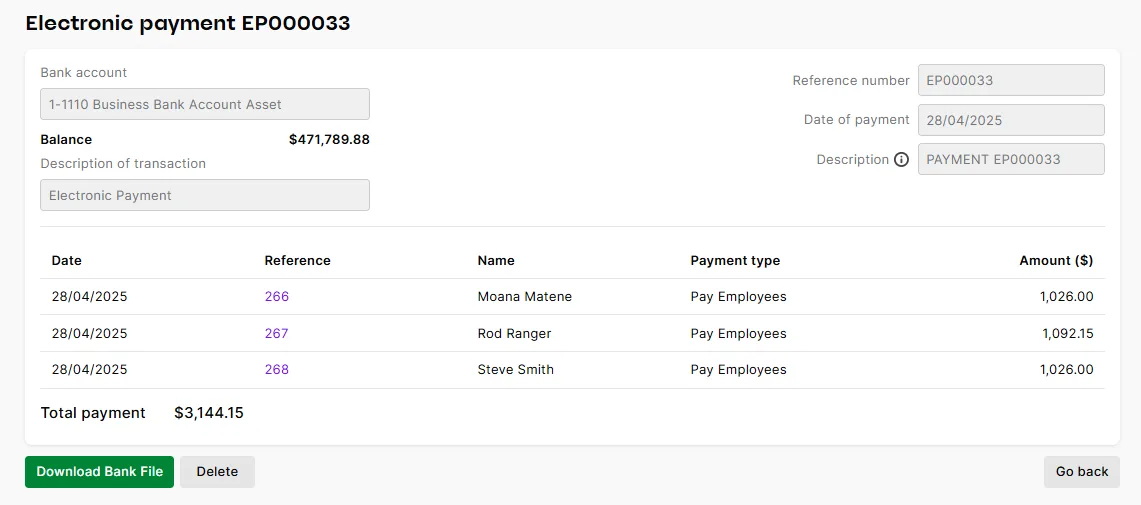
Click Delete.
At the confirmation message, click Delete. The grouped electronic payment transaction is deleted. When you go to the Prepare electronic payments page, all the payments within in will be listed again.


2. Create individual electronic payments
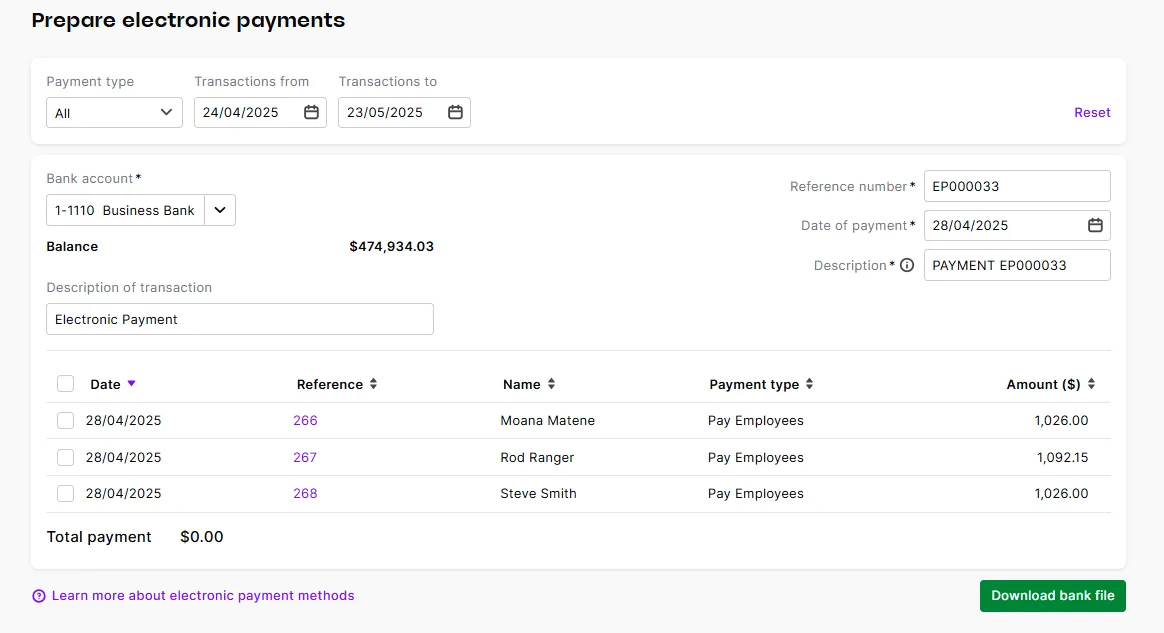
Go to the Banking menu and choose Prepare electronic payments. All the payments you've recorded in MYOB that you've chosen to pay electronically will be listed.
Choose the Pay Employees payment type.
Use the Transactions from and Transactions to fields to show transactions for a specific date range.
Choose the Account your payments will be paid from. This is the account you set up as part of setting up electronic payments.
If you want, update the Description of transaction to help you identify the individual employee payment. This is just the description of the transaction as it'll appear in MYOB, not on any bank statements.
Confirm the Reference number is correct. If not, enter a new number.
Enter the Date of payment.
Confirm the Description and change if required. This is the description that'll appear on your bank statement.
As the payments are already in your bank feeds and we won't be uploading this bank file, you can skip this step or update it to match the bank statement description in your bank feed.
Select just one of the payments you want to pay electronically.
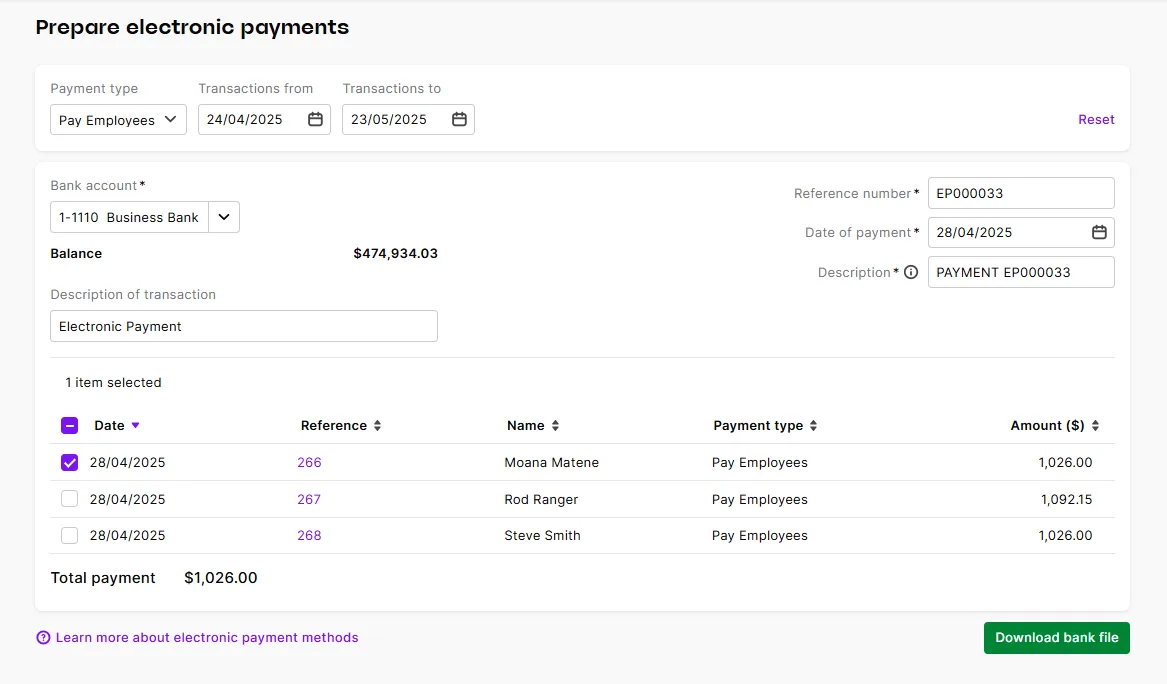
Click Download bank file and in the confirmation message click Download bank file.
Repeat from step 5 for an other payments you want to download bank files for.
As the payments are already in your bank feeds, don't upload these bank files. You just need to match them.

3. Match the bank transaction to the individual payments
Go to the Banking menu > Bank transactions.
Find the payment transaction you want to match the individual electronic payments record you created in '2. Create individual electronic payments', above. If there is a suggested match, you just need to click the tick to approve it.
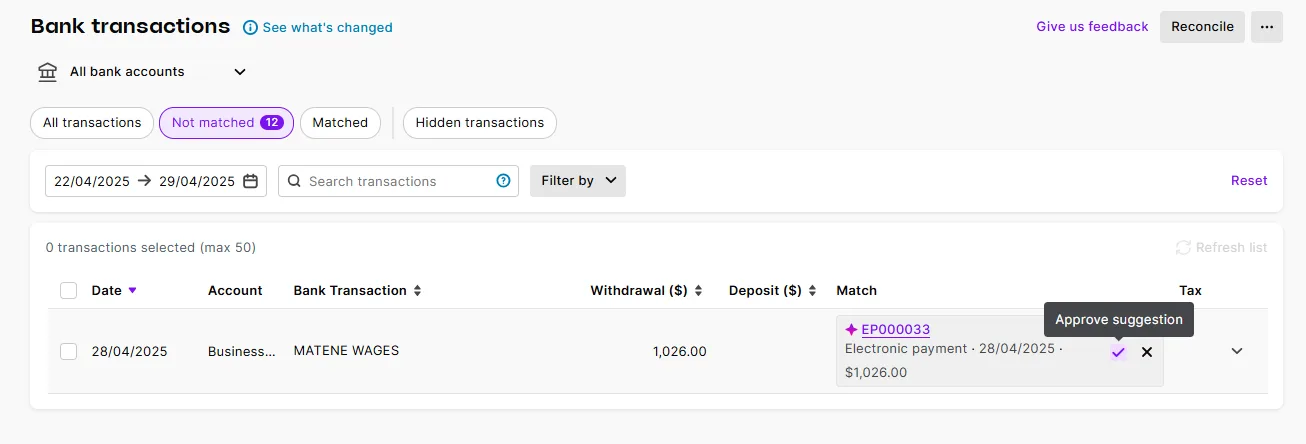
If there isn't a suggested match, or you want to see more details, click the dropdown arrow next to the transaction.
On the Match to existing record tab, select the electronic payment you want to match:
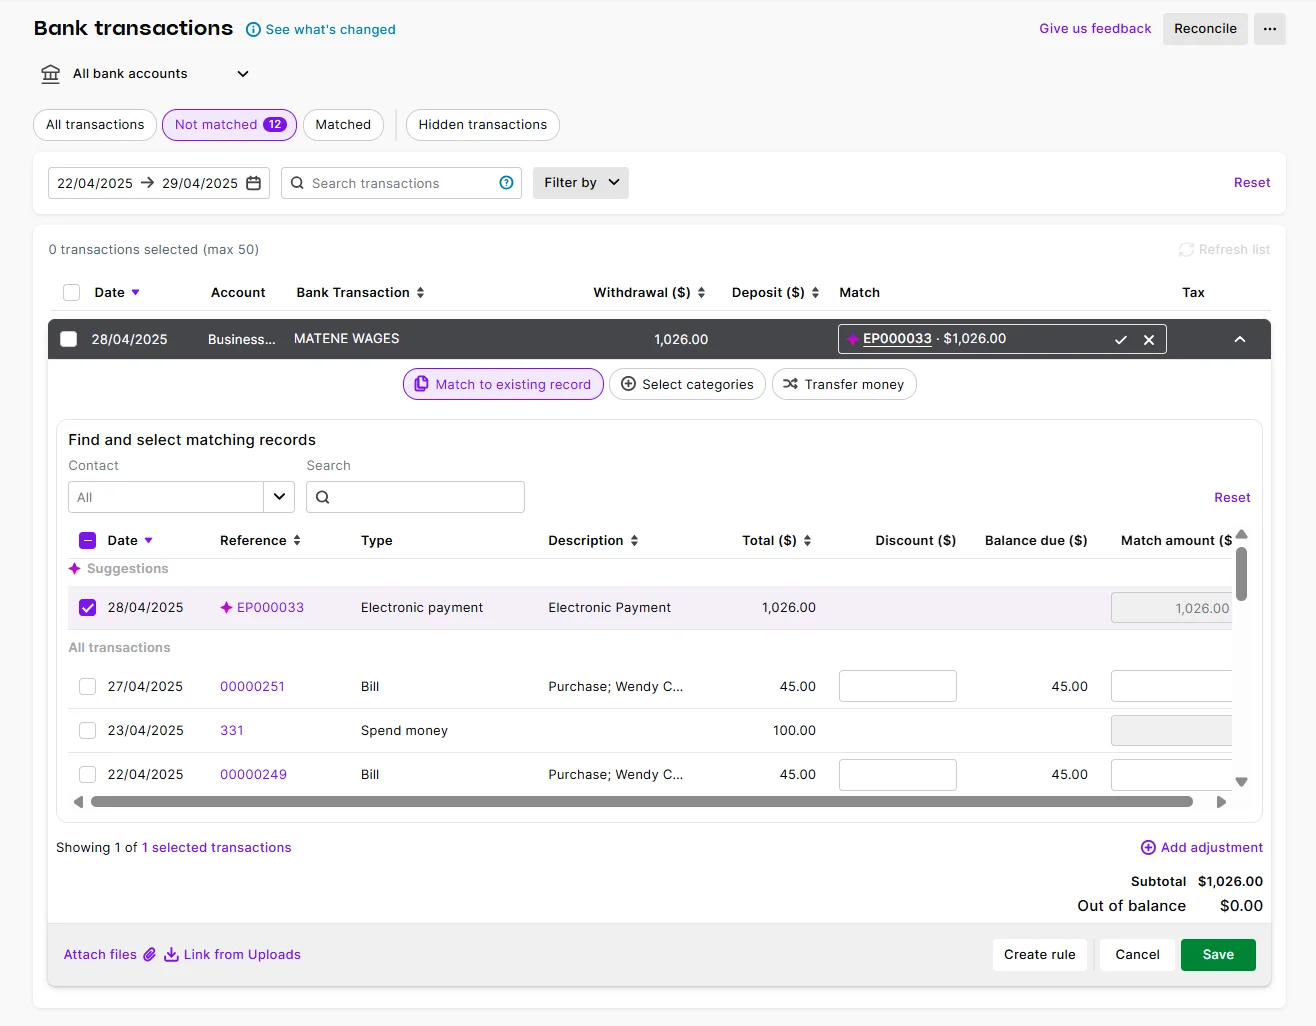
Once you've finished matching, the Out of balance must be $0.00.
If there's a rounding difference in the amounts, you can click Add adjustment and record a transaction to bring the Out of balance to $0.00.
Click Save.


Option 2: Categorise the bank feed transaction to a clearing category
This is a relatively straight-forward workaround but it has a few steps. If you need assistance with doing this, consult your accounting advisor.
Let's take you through it.
1. Create a payroll clearing category
If you don't already have one, create a 'Payroll Clearing Category' or similar (Bank category type) by going to the Accounting menu > Categories (Chart of accounts) > Create category (need a refresher on creating categories?). Ensure that you enter your banking details for the bank account you're transferring funds from:

2. Create the electronic payment
Go to the Banking menu > Prepare electronic payments.
Choose the Payroll Clearing Category as the Bank account your payments will be paid from. Because you've entered the banking details into the Payroll Clearing Category, the electronic payment file will be created with the correct details, ready for you to upload:
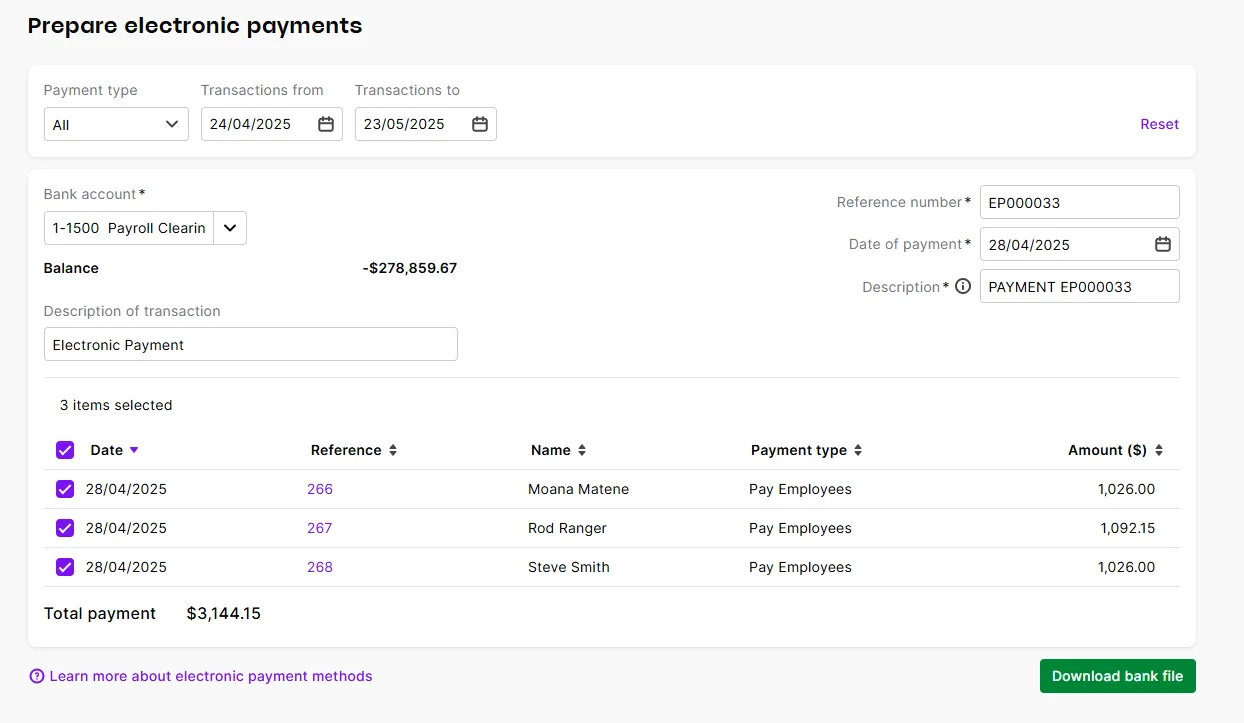
Select the payments and click Download bank file.

Upload the bank file as you normally would.
3. Match the separate payments to the payroll clearing category
Once your bank feed comes through, showing the payments you have made to your employees, go to the Banking menu > Bank transactions page and match the separate payments to the newly created payroll clearing category:

In the background, MYOB Business creates spend money transactions from the account the payments came out of to the payroll clearing category.
4. Confirm that your bank accounts balance
After allocating the payments:
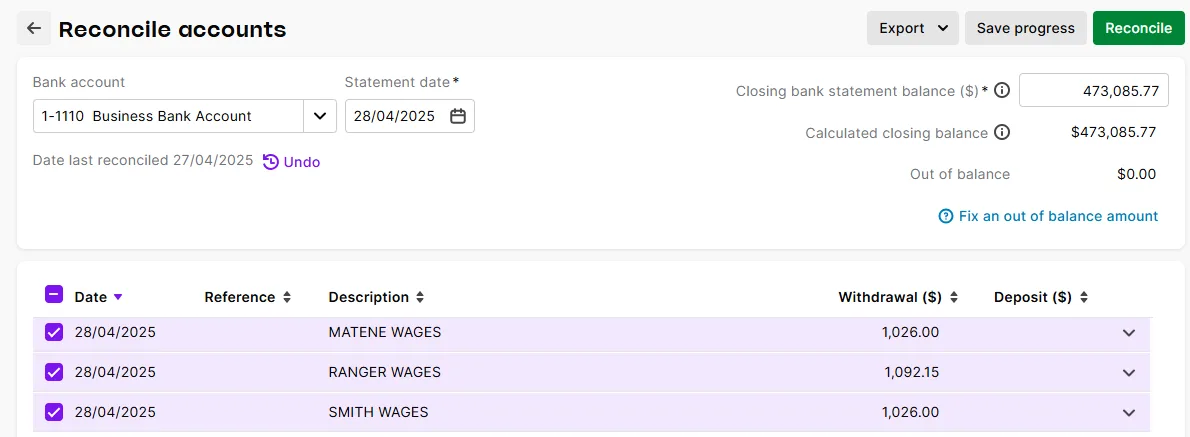
the bank account you pay wages from should now reconcile with the real life balance, showing the payments being withdrawn to pay each employee.
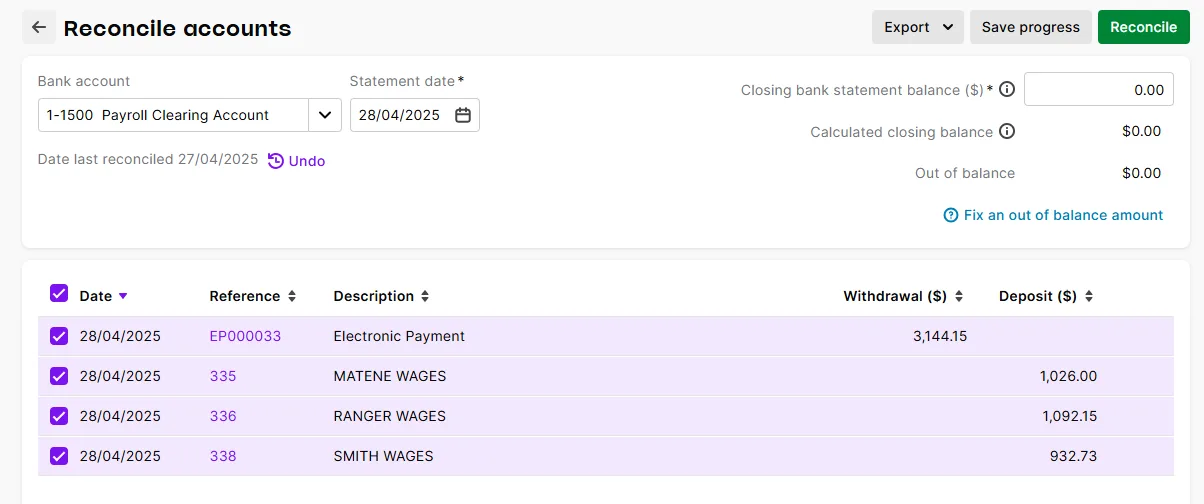
your Payroll Clearing Category should reconcile to $0 (because the electronic payment withdraws the total amount, then categorising each bank feed to that account deposits each amount back in, these amounts should balance).
Go to Banking menu > Reconcile accounts.
In the Bank account field, choose the Payroll Clearing Category. The Payroll Clearing Category should reconcile to 0$:
and the bank account you pay wages from should reconcile:


Need help?
If the steps above didn't help you, you can contact us.